Drywall Repair Mesa AZ can address holes, cracks, and other blemishes. While minor and isolated dents and scratches may be a do-it-yourself project, cracks require professional attention.
Professionals are equipped with specialized tools that ensure precision and quality work. They also address underlying problems, preventing future damage and saving homeowners time and money.
You can use spackle to patch the vast majority of holes. This is the simplest type of drywall repair and works for small nail holes, dents, and dings. To do this, apply a small amount of joint compound (aka drywall mud) with a putty knife and then smooth it out using the ridged side of your putty knife. After it dries, you can lightly sand the surface and feather in the edges so it blends into the wall. It’s also a good idea to prime the patch after it’s dry.
Larger holes, or those caused by removed fixtures, require a more involved repair process. Silva demonstrates a simple technique for this in the video below. First, he cuts a piece of new drywall slightly larger than the hole to ensure it will cover it completely. He then applies a piece of mesh drywall tape to the back of the new section. Finally, he uses a drywall saw to cut along the traced line, enlarging the hole to a clean rectangular shape.
The next step is to apply a thin layer of joint compound over the patch and surrounding area. This is important to prevent moisture damage and to strengthen the seam. Apply a second coat after it dries. When sanding the surface, be careful not to nick any electrical wires or plumbing. Then, once again, lightly sand and feather the edges so that the patch blends into the wall.
If the hole is in a corner, you may need to replace the drywall corner bead. This is an L-shaped metal strip that’s nailed over the corners of a sheet of drywall to protect the joint from moisture and to hold it in place. It can get dented or even broken from running a vacuum cleaner over the wall, kids flinging toys, and moving furniture. To fix this, carefully remove the existing corner bead and replace it with a new one.
While minor blemishes like nail holes and dents can be covered with a quick dab of paint, bigger ones will require repainting the entire wall. Make sure the new drywall is primed, as unprimed compound will absorb the new paint and create an unsightly patch.
Repairing Cracks
When two sheets of drywall meet at a wall corner, the joint is protected by an L-shaped piece of metal called a corner bead. While drywall is pretty tough, it’s not indestructible and over time, especially in homes that settle unevenly, it can crack. These cracks often appear as hairline fractures in the drywall near windows and doors. While they aren’t the end of the world, these cracks do indicate that it’s time for a little more serious drywall repair.
When fixing these types of cracks, it’s important that the crack be completely clean and free of debris such as nails or screws. Next, apply a thin coat of joint compound using a putty knife. Allow the first coat to dry and sand it smooth before applying a second thin coat.
A good tip for this process is to use a flexible joint compound knife as it spreads much more evenly than the stiff, flat one that usually comes with a patch kit. It also allows you to easily feather the edges of the patch and drywall to help it blend into the rest of the wall.
Once the patch is completely dried, use a sanding sponge to sand it smooth. If the sanding causes any of the surrounding drywall to become loose, simply re-adhere it with more joint compound.
If the drywall cracks are very straight-line, it’s likely that the corner bead has been dented. These are common due to things like children flinging toys or running furniture into the wall. To fix the problem, you’ll need to cut away a bit of the existing tape from both ends of the damage (Image 1), then nail a strip of self-adhering mesh tape over the seam, bridging the gap between the existing tape and the stud edge (Image 2).
Next, apply another thin coat of joint compound to the patch and tape. Make sure to feather the edges again so that the repair blends in with the surrounding drywall. Once the second coat is fully dry, you can sand again and apply a third coat if necessary. After all three coats are applied, the repaired area is ready for painting.
Touching Up Repairs
Drywall is fairly resilient, but that doesn’t mean it can’t suffer from unsightly marks, dents, and holes. Whether it’s from moving or accidentally bumping your walls, a little bit of drywall touch up can make all the difference. Using a little bit of spackle and a smoothing tool, you can make a wall look brand new. And since you’ll be repainting anyway, it’s a lot easier than replacing the entire piece of drywall.
Small scratches and scuffs are common and can usually be easily fixed by simply applying a fresh coat of paint to the affected area. For a more extensive repair, you may need to add a second coat or sand the surface lightly afterward. Small dings and nail holes, on the other hand, require a more substantial fix. In most cases, these blemishes can be filled with a drywall patch kit, a quick application of joint compound and a bit of sanding to blend in the repaired area.
If the damage to your drywall is much larger than a hole, you’ll likely need to use a patch kit that includes furring strips. This will help prevent the patch from collapsing into the surrounding wall. This type of drywall repair requires more skill than the simple smudging of spackle, but it’s still within the realm of most do-it-yourselfers.
Before you patch the damaged area, you’ll need to clean out the hole. This means removing any loose strands of tape and any other debris that could show through your finished work. It’s also important to locate and mark the location of any electrical wires or other utilities before you cut into your walls. Using a stud finder can help with this.
Once you’ve completed the drywall patching, you can apply your chosen texturing to the area. Then, once your textured surface is fully dried, it’s time to re-paint the repaired area. If possible, try to match the exact same color and sheen that was used in the original area of your wall. This will ensure that the repaired areas are hardly noticeable, and that they blend seamlessly into your home’s overall aesthetic.
Repainting
While it is tempting to save time and money by simply painting over the current paint in a wall, this is typically not recommended and can cause a variety of problems. It is important to prep the surface to be painted, which means sanding and adding a primer before applying multiple coats of paint. This will ensure that the new paint adheres properly and helps to create a smooth, polished look.
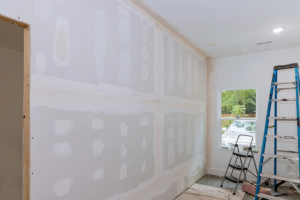
A drywall repair project that includes repainting will usually include installing corner bead, taping, mud, and sanding the entire wall before applying a primer and two topcoats of paint. This can take a lot of time and effort, but will result in a high-quality, professional-looking finish.
To make your drywall repair project as easy as possible, consider investing in some quality tools to get the job done right. You will need a good set of brushes, including angled ones for corners and edges. You will also need a good roller and tray to cover large areas with ease. Sandpaper of various grits will come in handy for smoothing the repaired surfaces. You will want to have a bucket of water on hand to clean your tools after each use, as well as drop cloths to protect your floor and furniture from paint splatters.
When working on small holes and nail pops, it is often possible to fix them with spackle or a lightweight joint compound. Apply a thin layer of the compound, using a drywall knife to smooth and feather the edge so it blends with the surrounding wall. Allow the compound to dry before sanding it with a fine-grit sandpaper.
For larger holes or patches, or for more extensive damage, a new piece of drywall may be necessary. This can involve cutting a new piece of drywall to the size needed, then screwing it into place and sanding it to match the existing wall. This type of drywall repair can be complicated and requires the assistance of a professional, especially for any structural repairs.
Whether it’s nail pops, cracks, or major damage, making repairs to drywall before painting will help the final product last longer and look better. In addition, addressing any issues quickly will prevent them from becoming more serious and expensive to repair.